Images and videos are part of what make digital signage so effective. Here are some tips and tricks for using images and video that will help produce a more quality outcome.
Understanding and Resolving Letterboxing
Creating Images Using PowerPoint
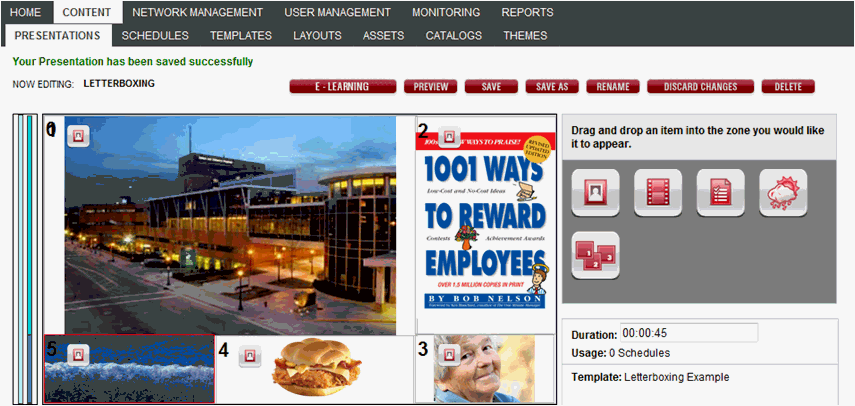
Using the example below we will talk about scaling images, letterboxing, and resizing images for zones with the wrong orientation. There are five zones that contain images (some could be playlists). Four images are inserted with the default scaling: Scale To Fit, with one of those images having a transparent background (the sandwich). The image in Zone 5 is set to Stretch To Fit.

In computer graphics, image scaling is the process of resizing a digital image. Scaling is a process that involves a trade-off between efficiency, smoothness, and sharpness. As the size of an image is increased, so the pixels which comprise the image become increasingly visible, making the image appear "soft." Conversely, reducing an image will tend to enhance its smoothness and apparent sharpness.
The scaling in Ronincast X deals with the relationship between the image and the boundaries of the zone.
When selecting an image or video to a zone as an individual image or in a playlist, there are three options for scaling: Scale To Fit, Stretch To Fit, and Center.
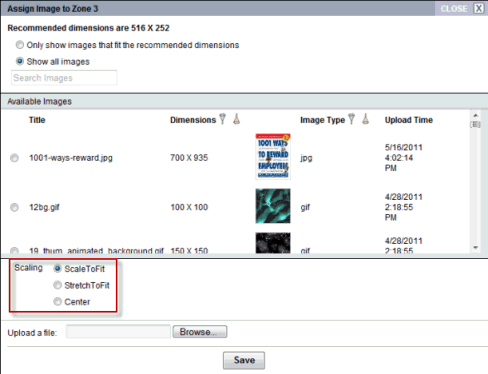
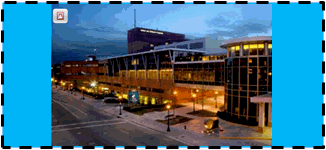
Image is sized to fit the zone, but aspect ratios are maintained. Any space between the edge of the image and the boundary of the zone will appear in black (letterboxing) once pushed to the player.
This setting will stretch content to fill your zone and aspect ratios are not maintained. As a result, the picture may look out of proportion.
Image is centered and any space between the edge of the image and the boundary of the zone will appear in black (letterboxing) once pushed to the player. Parts of the image may be cut off on the sides or the top and bottom.

NOTE: The following file formats may not stretch to fit depending on the configuration and specific content: SWF, AVI, WMV, MPG, and DIVX.
Understanding and Resolving Letterboxing
Letterboxing is the practice of transferring film shot in a widescreen aspect ratio to standard-width video formats while preserving the film's original aspect ratio. The resulting videographic image has mattes (black bars) above and below it; these mattes are part of the image (i.e., of each frame of the video signal).
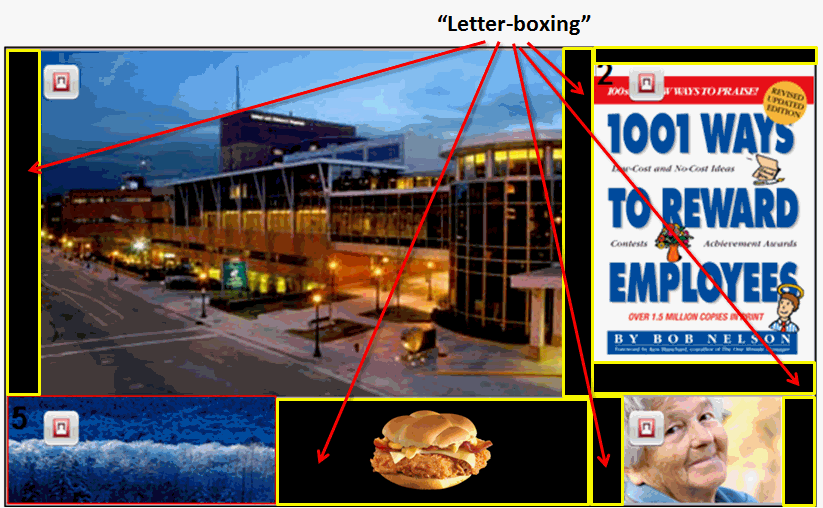
In the context of digital signage and more specifically, Ronincast, letterboxing is the black bars or background that appear where the image doesn't meet the boundary of the zone or an image with a transparent background, such as the sandwich below.
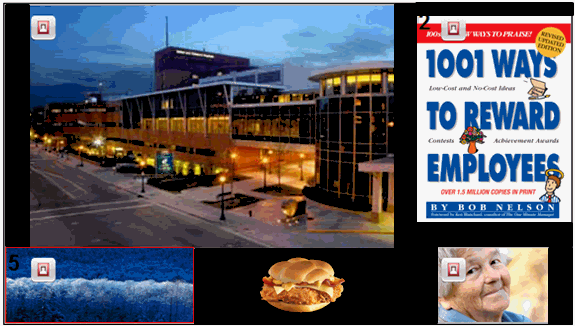
Black letterboxing will not appear on your desktop when you are working with the software. It will only appear on your display once you push the presentation out to the player. There is a way to preview if letterboxing will occur on your display. Clicking the Preview button on the Presentation Editor will not give you a true picture of letterboxing.
To preview areas that will display in black, hover your mouse over the zone in the presentation. Any gray areas that appear will display in black on the display.
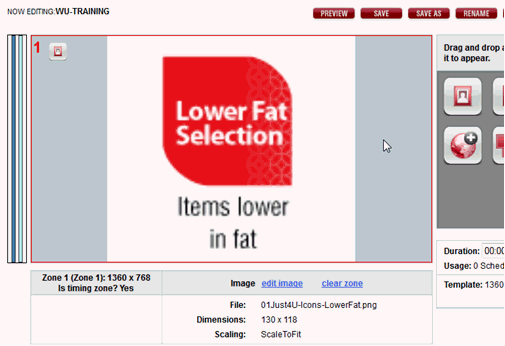
In the above example, the actual image is square with a white background. In this 16:9 ratio zone, this square image will have wide black bars on both sides.
There are some workarounds for solving letterboxing. Each of these will be addressed in more detail below.
■ Stretch to Fit (if it won't distort the image)
■ Place image in a catalog item and assemble using the Custom Layout Widget
■ Use PowerPoint to create a matching background behind the image and manipulate shape to fit zone.
The Stretch To Fit setting will only be appropriate in limited situations. Background images with non-distinct patterns or images that are just a few pixels from being the correct proportion. In most cases, this will not be the best option.
Creating Catalog Items for images or videos to prevent letterboxing will not work for playlists. To prevent the black letterboxing from appearing around your playlist images, use PhotoShop or PowerPoint (easier) to create a white or matching background behind the image in the shape that you need. It isn't a perfect workaround, but it removes the black boxes. Here's how:
1. Open Microsoft® PowerPoint®.
2. Copy and paste image into PowerPoint. For example:

3. Either
crop your image using the crop tool  or create a white
background.
a. Determine the size and orientation (landscape, portrait, or square) needed for the image.
b. Using the drawing tools in PowerPoint, draw the correct shaped box on top of the image.

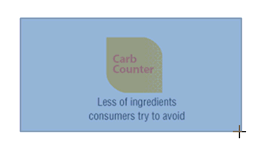
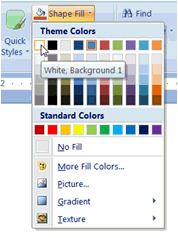
c. Using the Shape Fill and Shape Outline tools in PowerPoint, turn the line and fill white.
d. In the Home tab of PowerPoint, click the Arrange drop-down and select "Send to Back."
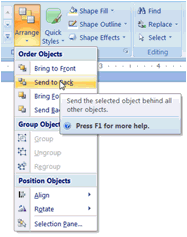
The white box is now behind your image.
e. Using the Shift key or by dragging the cursor over both images, select both the white box and the image and select "Group" from the Arrange drop-down list.

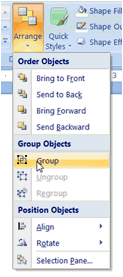
4. Right-click on image or group and select "Save Picture As..." Save it as a .png or .jpg format.
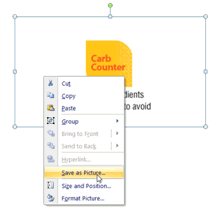
5. Upload the image into the Asset tab in Ronincast.
Place image in a catalog item and assemble using the Custom Layout Widget.
Step 1: Create Catalog Item for image
See Create New Catalog Item for steps on adding an image to a Catalog Item.
Step 2: Add image to presentation
See Adding Custom Layouts to a Presentation Zone for more information.
NOTE: Keep the shape of the zone in mind when selecting images. If the zone is landscape and you have a portrait image, the image will become distorted.
Resizing Images for Playlists and Zones with Incompatible Orientation (Landscape vs. Portrait)
If you have a landscape or portrait image that needs to be fit into a different orientation, the following link contains a free software download called DVDVideoSoft. It will convert several different types of images and videos to the size you want and into different formats.
http://www.dvdvideosoft.com/products/dvd/Free-Image-Convert-and-Resize.htm
Creating Images Using PowerPoint
Static images can be created in Microsoft PowerPoint along with several other tools. Before the content is created, the page in PowerPoint needs to be set up correctly. Not all outputs (monitors, tablets, phones) have the same aspect ratio (the relationship or ratio of the width of an image to its height) so the aspect ratio of the images should match the output. The default page setup in PowerPoint is 4:3.
Use the following table to find the screen resolution at your site and the aspect ratio to set in PowerPoint.
Aspect Ratio |
Screen Resolution |
16:9 |
1280 x 720 |
|
1360 x 768 |
|
1600 x 900 |
|
1920 x 1080 |
16:10 |
1280 x 800 |
|
1440 x 900 |
|
1600 x 1000 |
|
1680 x 1050 |
4:3 |
640 x 480 |
|
800 x 600 |
|
1024 x 768 |
|
1152 x 864 |
|
1400 x 1050 |
|
1600 x 1200 |
To create an image using PowerPoint:
1. Set the correct shape (aspect ratio) of the PowerPoint slide by clicking the Design tab and then Page Setup.
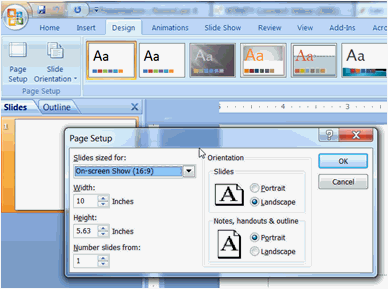
a. Click the drop-down arrow under Slides sized for.
b. Select the Aspect Ratio that will best fit the zone. The default for PowerPoint is On-screen Show (4:3). For a shorter and wider image, e.g., a one-zone 1360x768 presentation has an aspect ratio of 16:9.
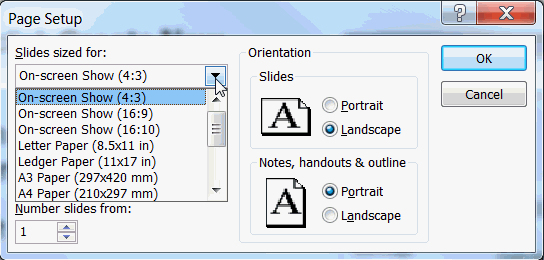
2. Enter text and images.
IMPORTANT: The background of this content will not be transparent on the display. Any blank backgrounds will display in black.
3. Click Save as from the File menu, then select Other Formats.
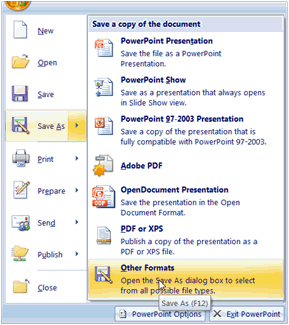
4. Name the file in the File name field using our recommended naming conventions, if desired.
5. Select PNG or JPEG from the Save as type drop-down list.
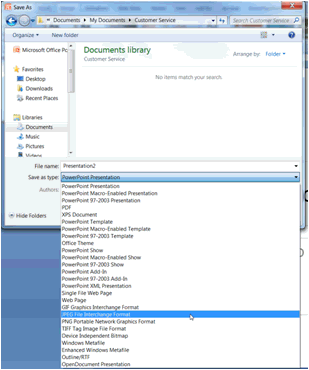
6. Click Save.
7. Upload picture into the Assets tab. See Adding a New Asset for more information. The picture will now be available for conventional playlists.
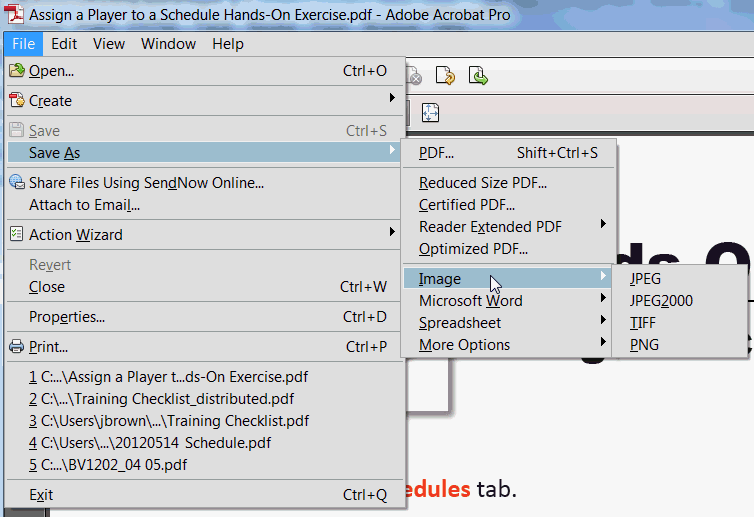
Any PDF can be turned into an image and uploaded into RoninCast as an asset (see Adding a New Asset).
In the PDF, click the File menu and then Save As.
Select Image, and then choose JPEG or PNG.
NOTE: Do not select TIFF or BMP.
