
After the template, catalog items, themes, and layouts/layout groups have been created, you are ready to create your presentation.
Presentation Strategies and Guidelines
Assembling a Presentation Using Widgets
Adding a Playlist to a Presentation Zone
Adding the Weather Forecast to a Presentation Zone
Adding Custom Layouts to a Presentation Zone using the Layout Widget
Overriding a Theme in a Presentation
Adding a Zone Schedule to Presentation Zone
Adding a Ticker to Presentation Zone
Scheduling and Pushing Out a Presentation to a Player
Saving a Presentation as a Different File Name
Discarding Changes to a Presentation
Editing an Existing Presentation
![]()
Presentation Strategies and Guidelines
■ Rather than have one presentation and make changes every day, create 1-4 weeks of presentations using the Copy button. Name each one using the naming conventions we recommend (Presentation Naming Conventions). See Creating Cycle Menus.
■ A zone in a presentation can be cleared by using the clear zone link. See Clearing a Zone.
■ Catalog Items can be edited in the presentation on the Presentation editor page. See Editing an Existing Presentation.
■ Do not use the Image Widget to place a background image behind zones containing custom layouts in the presentation as it will layer incorrectly. Use the Custom Layout Widget. See Adding Custom Layouts to a Presentation Zone.
■ For some tips and tricks for using images and playlists in your presentation, see Working with Images.
Click the Content/Presentation tab to see the following window, which lists the existing presentations.
In this window, you can do the following:
■ Click a presentation wireframe to preview the presentation.
■ Click Create New Presentation to create a new presentation.
■ Click Copy to copy the presentation and save it under a new name.
■ Click Edit to open and edit the presentation.
■ Click Delete to permanently delete the presentation.
IMPORTANT: This cannot be undone.
■ Search for a presentation by entering the file name or the first few characters in the Search field.
■ Click any column head to sort the presentations in ascending or descending order by the information in the column.
For Example: To sort in ascending order by presentation name, click the Name column head. An up arrow appears next to the column head. If you click the column head again, a down arrow appears and the presentations are sorted in descending order by name.
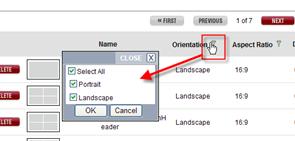
■ Click
a Filter icon ![]() to
open a list of options in that list to select or deselect and filter down
the list.
to
open a list of options in that list to select or deselect and filter down
the list.
Each tab under the Content
tab displays a Folder Navigator icon  providing
the opportunity to access the folders you have created in your RoninCast
system. See Using Folder Management
for information on creating new folders.
providing
the opportunity to access the folders you have created in your RoninCast
system. See Using Folder Management
for information on creating new folders.
To use the Folder Navigator:
1. Click the Folder Navigator icon . The
Root of the folders displays.

2. Click the arrow to expand the Root.
3. Select a folder. A drop-down list appears next to the Root drop-down box.

4. Click GO to open the list or to present another sub-folder drop-down list.
|
Naming Convention Best Practices (Click to open) |
Before content can be added, an empty presentation must first be created which includes selecting the desired template as its base.
To create a new presentation, do the following:
1. Click Create New Presentation.
The following window appears:
2. Select a folder in which to place the new presentation. The following window appears:
NOTE: For more information about Folder Management and creating new folders, go to Using Folder Management.
IMPORTANT: If a folder is not present under the Root, a folder will need to be created under Folder Management before an object can be created.
3. To filter the templates to choose from, select the following:
■ Orientation (Landscape or Portrait). This is based on the orientation of the display used to play the presentation.
■ Aspect Ratio of the display (click the drop-down arrow to see the options).
■ Show only templates I have used previously
4. Select a Presentation template.
NOTE: The templates are displayed in thumbnail mode. If there are more than ten templates, use the scroll bar to see the rest of them. The first template is selected by default (as indicated by the red outline around it).
5. Enter a name for the presentation. See Naming Convention Best Practices
6. Click Create Presentation.
The Presentation editor appears.
7. See Assembling a Presentation Using Widgets for adding different types of content using widgets.
8. After populating each zone, click Save to save the presentation. The new presentation is added to the list in the Content/Presentations window.
TIP: You can enter a few characters of the presentation name in the Search field and press Enter (or click the magnifying glass) search and find it quickly.
Assembling a Presentation Using Widgets
The Presentation editor appears after you name and create the presentation.
See Working with Images for information on manipulating images.
You can drag and drop the following content into a zone:
|
Image allows you to select a still image (PNG, JPG, or GIF format). |
|
Movie or Animation allows you to select a movie or animation (WMV, MP4, MOV, AVI or Flash format). See Adding a Movie or Video to Presentation Zone for recommendations on movie formats. |
|
Playlist allows you to select a sequence of images, movies and animations. |
|
Weather shows the current weather conditions for the zip code that you specify. |
|
Layout Widget opens the Layout Configuration window enabling you to select a previously created layout. Catalog Items are then inserted into the layout zones. |
|
Web Cam allows you to assign a web camera to a particular zone and display live images. |
|
Web Page will display the web page address entered in the Assign Web to Zone form. |
|
Zone Schedule enables you to build a playlist of presentations in a zone and schedule those presentations with the same flexibility as the regular schedule. |
|
Ticker Widget allows you to specify an RSS feed or select catalog items that will scroll across a zone. |
NOTES:
■ Zone numbers, zone boundaries, and pixel dimensions are revealed for all zones.
■ Clicking on a zone populates the Zone Details Panel for that zone.
■ To see a description of a widget, hover the cursor over the widget.
■ When a widget is dropped into a zone, a dialog box may ask for required information, depending on the widget type.
The Image Widget adds a single image to a zone. If adding a background image behind zones that contain layouts, see Understanding the Z-Index for further instructions.
See Working with Images for information on manipulating images. Adding a background image? See Adding_Background_Images.
|
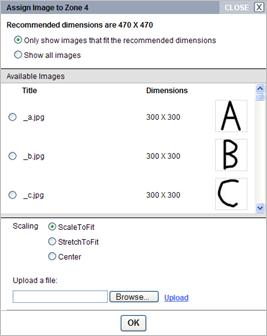
When you drag the Image widget into a zone, the Assign Image dialog box appears. Select the image (PNG, JPEG, or GIF format) to appear in the zone. |
1. Drag the Image Widget onto the zone in the presentation. The Assign Image window appears.
2. To filter the images listed under Available Images, select one of the following:
■ Only show images that fit the recommended dimensions
■ Show all images
■ Access a folder of assets by using the Folder Navigator. See Using Folder Navigator.
■ Click the column headers: Title, Dimensions, Type, and Uploaded date.
3. Select the file from the Available Images list or upload a new file. To upload a file, click the Upload button and use the same steps outlined in Adding a New Asset.
4. Under Scaling, choose one of the following:
■ Scale To Fit: Image is sized to fit the zone, but aspect ratios are maintained. Any space between the edge of the image and the boundary of the zone will appear in black once pushed to the player.
■ Stretch To Fit: Image is stretched to fit the zone and aspect ratios are not maintained.
■ Center: Image is centered in the Zone Details to fill up extra space in the zone.
TIP: See Working with Images for more information on scaling.
5. Click OK.
The image appears in the zone. You can edit the zone by selecting it and clicking edit image. See Editing an Existing Presentation.

6. Click Save.
Background images that will be located behind zones that contain layouts must be inserted into the presentation using the Custom Layout Widget. It cannot be inserted using the Image Widget as it will layer on top of the other zones and not behind them as desired.
Create a layout and a catalog item for the background image.
|
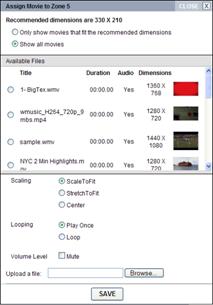
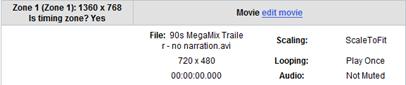
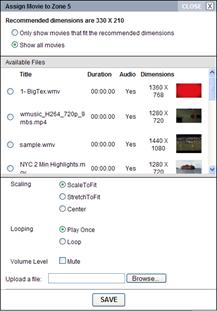
When you drag the Movie widget into a zone, the Assign Movie dialog box appears so you can choose the video or Flash (WMV, MP4, MOV, AVI or SWF). |
1. Drag the Movie Widget onto the zone in the presentation. The Assign Movie window appears.
2. To filter the movies shown under Available Files, select one of the following:
■ Only show movies that fit the recommended dimensions
■ Show all movies
■ Access a folder of assets by using the Folder Navigator. See Using Folder Navigator.
3. Select the file from the Available Files list or upload a new file. To upload a file, click the Upload button and use the same steps outlined in Adding a New Asset.
4. For Scaling, choose one of the following.
■ Scale To Fit: Movie is sized to fit the zone, but aspect ratios are maintained
■ Stretch To Fit: Movie is stretched to fit the zone and aspect ratios are not maintained
■ Center: Movie is centered in the Zone Details to fill up extra space in the zone
NOTE: Not all movie formats stretch to fit.
5. For Looping, choose whether the movie will play once or repeat for the duration of the schedule.
6. For Volume Level, you have the option to Mute or un-mute the volume.
7. Click OK.
You can edit the zone by selecting it and clicking edit movie.
8. Click Save.
Both images and videos can be added to a zone in a playlist format rotating through the list based on the duration set on each image and the natural duration of the video. These images and videos can be reordered in the playlist.
See Working with Images for information on manipulating images.
|
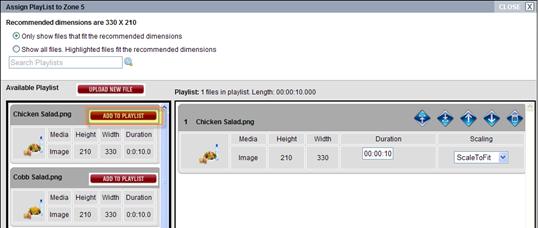
When you drag the Playlist widget into a zone, the Assign Playlist dialog box appears. You can select a sequence of images, movies and animations, and specify the duration for each one. |
1. Drag the Playlist Widget onto the zone in the presentation. The Assign Playlist window appears.
2. To filter the files shown under Available Playlist, select one of the following:
■ Only show files that fit the recommended dimensions
■ Show all files. Highlighted files fit the recommended dimensions
■ Access a folder of assets by using the Folder Navigator. See Using Folder Navigator.
3. From the Available Playlist list, select each file you want in the playlist by clicking Add to Playlist.
■ Files are added in the order you select them.
■ Files can be added to the playlist multiple times. Each file plays once.
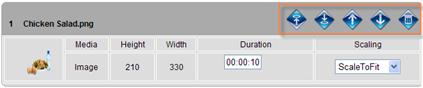
■ Once they are in the playlist, you can click move up or move down to adjust the order in which they play. You also can remove a file from the playlist.
NOTE: Removing a file from the playlist does not remove it from the Asset Library.
4. To upload a new file to the playlist, click Upload at the bottom of the Assign Playlist window. The Upload Files window appears.
5. Click Add Files. The Select files to upload window appears.
6. Select the appropriate Files of type from the drop-down list, e.g., Audio Files, Icon Image Files, or Video Files.
7. Select the file(s) and click Open. The Upload Files window with a progress bar for the file appears.
TIP: Using the Ctrl key, multiple files can be selected to upload into the list.
5. Click Upload Files.
NOTE: The file uploads and can be removed by clicking Clear Files.
6. Click OK. The assets are added to the playlist.
TIP: If you will not be using the uploaded assets in this playlist, click the trashcan icon in the asset and it will be removed from the playlist but not from your system.
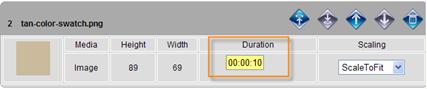
7. Under Duration in the Playlist dialog box, enter the amount of time you want the file to display.
NOTE: The default setting for an image is 10 seconds while movies and .swf files are set to “0” seconds and play to their conclusion.
8. Select the scaling:
■ Scale To Fit: Item is sized to fit the zone, but aspect ratios are maintained
■ Stretch To Fit: Item is stretched to fit the zone and aspect ratios are not maintained
■ Center: Item is centered and a border will be used to fill up extra space in the zone
TIP: See Working with Images for more information on scaling.
9. Click OK. You can edit the playlist by selecting the zone and clicking edit playlist.

10. Click Save.
The weather widget is a simple weather feed that displays the forecasted temperature for three days. This weather widget displays U.S. weather only and does not accommodate other types of zip codes.
|
When you drag the Weather widget into a zone, the Assign Weather dialog appears. |
1. Drag the Weather Widget onto the zone in the presentation. The Assign Weather to Zone X window appears.
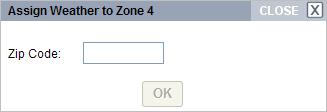
2. Enter the Zip Code of the area (U.S. only) for which you want to display weather information.
NOTE: This widget only works for U.S. cities.
3. Click OK.
4. You can edit the zone by selecting it and editing the Zip Code.
5. Click Save.
The Web Page widget allows you to enter a URL of a web page to display in a zone. The web page does not scale to the zone.
|
When you drag the Web Page widget into a zone, the Assign Web dialog appears. |
1. Drag the Web Page widget onto the zone in the presentation. The Assign Web to Zone X window appears.
2. Enter the Web Address of the web site you want to display.
3. Click Save.
4. Click Preview in the Presentation page to view web page in zone. If the zone is too small, scroll bars will appear.
TIP: Web pages are not scalable. The zone in which the web page will display should be created with the same dimensions as the web page when displayed.
RoninCast can be configured to play a web cam live stream.
|
When you drag the Web Cam widget into a zone, the Assign WebCamera dialog appears. |
IMPORTANT: Before installing web cam, please contact our support team as configurations needs to be made by Wireless Ronin.
1. Drag the Web Cam widget to the zone. The Assign WebCamera to Zone dialog box appears.
2. Enter "http://localhost/camera.html."
NOTE: Consult the web camera's instruction manual for information on installing the camera's software for communicating from a web page.
TIP: To display the web cam stream from a web page, use the Web Page Widget (see Adding the Web Page to the Presentation Zone) and enter the same URL "http://localhost/camera.html."
3. Click Preview to test connection.
4. Click Save.
Layouts are used when the content being added to the presentation contains text that can be edited right within the presentation and is not part of a graphic. Before the content can be assembled in a presentation, a layout needs to be created (see Creating a New Layout) and the text entered in Catalog Items (see Create New Catalog Item).
The layout can also include images that can be swapped out within the presentation. Images are used in layouts when transparency is required. If an image requiring transparency is added to a presentation via the Image or Playlist Widget, the "transparent" area will play in black on the screen.
For Example: The image on the left has a clear background and was placed in the presentation using the Image Widget. The gray area of the image on the right indicates the area that would be black on the monitor.
The same image is placed in a catalog item and a layout has been created for it. When the image is added to the presentation using the Layout Widget, the background image behind the burger image will play through on the monitor.

|
Previously created Custom Layouts for background images, text, menu images, and prices can be inserted into your presentation using the Layout Widget. |
TIP: To understand the layering (Z-Index) of the zones in your presentation, see Understanding the Z-Index.
To populate a zone using the layout widget:
1. Drag the Layout Widget onto a zone.
The Layout Widget Configuration window appears.
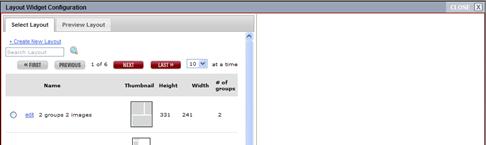
2. Do one of the following:
a. Click the Create New Layout link to start from scratch. The Edit Layout window appears. See Using Layouts Management.
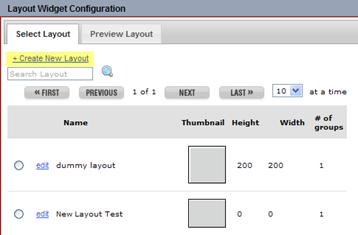
b. Or, select existing layout in the Select Layout tab. The Catalog Items list appears in the right pane. See Using Catalog Management.
If you select an existing layout, it displays in the Preview Layout tab on the left and the Catalog Item list displays on the right side.

Continuing with Custom Layout steps using the Quick Fixings Example
The layout you selected appears in the Preview Layout tab.
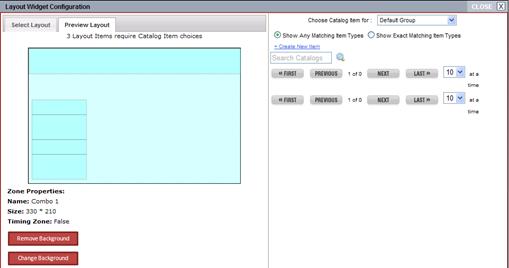
NOTE: The number of Layout Items requiring catalog item choices is displayed right under the Preview Layout tab.
3. Select a layout group from the Choose Catalog Item for drop-down list in the right pane. These layout groups were created in the Layout creation process. If there are no layout groups in the drop-down list, "Default Group" is the only group being used for this layout. In our Garden Salad Example, the “Item and Image” group is selected which is the layout group assigned to the header and the image.
NOTE: These layout groups were created in the Layout Creation process. See Using Layout Management and Using Layout Groups. For understanding on which Layout Group goes with which zone, see Determining the Correct Item Type in Catalog Item Creation).
4. Select the appropriate catalog item from the catalog item list. In the Garden Salad Example, you would select the catalog item that contains the name of the salad and the image of the salad.
NOTE: The Preview Layout zones will populate as catalog items are added. There should not be a blue zone visible when finished assigning catalog items to layout groups.
5. Continue selecting layout groups from the Choose Catalog Item for drop-down list and selecting the appropriate catalog item until all Layout Items display content in the Preview Layout tab.
In the Garden Salad Example, the “Prices and Sizes” layout group and “QF-Prices and Sizes" catalog item are selected. The Preview Layout displays that all zones have been populated.
6. Click Save in the Layout Widget Configuration window.

7. Continue populating other zones in the presentation, as appropriate.
8. Click Save in the presentation.
IMPORTANT: Clicking Save in the presentation sends the changes to the player automatically if the presentation has been scheduled and a player has been assigned.
9. If a Dependency List appears, click Yes at the bottom. Wait for the green message Your presentation has been saved successfully before closing the presentation.

Background images must be inserted into the presentation using the Custom Layout Widget. It cannot be inserted using the Image Widget as it will layer on top of the other zones and not behind them as desired.
Create a layout and a catalog item for the background image.
The theme that was applied to the layout item details (zones in the layout) can be overridden for the presentation currently being edited. Any changes using this function does not affect any other presentation. Any changes made to the theme applied in the layout would not affect this presentation until the Remove Theme button is clicked.
To override the theme:
1. Select the zone in the presentation and click the Change Content button.
The Layout Widget Configuration appears.
2. Click the area in the layout preview you wish to update. The Current Theme Properties appears below the layout.
The Current Theme Properties displays the theme that is currently applied to that layout item detail.
3. Click Change Theme.
The list of existing themes appears.
4. Select a different theme and click Save. The text displays in the theme selected.
IMPORTANT: As long as this theme override is in place, any theme changes made to the layout in the Layout tab would not appear in this presentation. The theme would need to be removed first.
5. Click Save in the presentation.
The theme change can be removed which places it back in its original state -- text displayed in the theme applied in the layout. This enables it to be part of a global change should the theme in the layout be changed.
To remove theme override:
1. Select the zone in the presentation and click the Change Content button.
The Layout Widget Configuration appears.
2. Click the area you wish to update. The Current Theme Properties appears below the layout.
3. Click Remove Theme.
The theme in the layout item detail for this presentation is now set back to the theme set in the layout.
4. Click Save in the presentation.
The Zone Schedule Widget enables you to build a playlist of presentations that play at a zone level within a presentation and schedule those zone-level presentations with the same flexibility as the regular schedule. The Zone Scheduler can rotate presentations, images, and videos within a given zone in the presentation. These presentations that can be displayed within a zone are called Zone-Level Presentations. These presentations are like any other presentation. They are created separately and can contain custom layouts, images, videos, or news feeds, etc.
For each object in the Zone Schedule playlist, start and end times, recurrences, and priorities can be set. It then becomes an Event. You can have multiple events in a given zone with different settings.
|
The Zone Schedule Widget enables you to build a playlist of presentations in a zone and schedule those presentations with the same flexibility as the regular schedule. |
Zone Scheduler Strategies and Guidelines
Adding a Zone Schedule to a Presentation Zone
Adding Multiple Events to a Presentation Zone
Creating Zone-Level Presentations
Editing an Existing Zone Schedule
Removing a Zone Schedule from a Presentation Zone
§ When using images or videos in a Zone Schedule, it is best to build a presentation with the images or videos so that the proper scaling can be set. This is done to avoid letter-boxing, which are the black bars on the top and bottom or left and right sides of an item. See Working with Images for more information on letter-boxing.
§ If you have a zone-level presentation that needs to end on a certain date while other zone-level presentations continue, create separate events within that zone. See Adding Multiple Events to a Presentation Zone.
The zone-level presentations are added to a zone via the Zone Schedule widget.

To add a zone-level presentation to a zone:
1. Drag the Zone Schedule Widget to the zone. The Manage Event window appears.
2. Rename the event in the Name field.
3. Click in the Start and End fields to open the calendar and time window.
4. Select the start date as well as the time this "event" should begin to play. Use the slide bars to select the Hour and Minute. The hours are in military time. Click Done.
NOTE: An event can contain one or multiple presentations that play in rotation. What defines an event is the presentations that are selected to play all share the same start and end date, timing, recurrence, and priority, similar to the regular schedule builder.
5. Set the recurrence for how often and at what interval this event should play.

IMPORTANT: An event or a series of events of any priority must be scheduled at all times to avoid a gray screen from playing in that zone. Unlike the regular site schedule, if there is not another presentation event to move to when the End time is reached, it will not keep playing the most recent event but will play a gray screen with a small black box in the corner.
6. If you plan on having multiple events in this zone that overlap, select Priority from the drop-down list.
■ Multiple events assigned the same priority that overlap will rotate between events for the duration of the overlap. The duration is set on the Presentation Management page below the widgets. The default setting is 45 seconds.
■ Multiple events at different priorities will be overridden by the event with the highest priority (the lowest priority value)
TIP:
By always setting your regular events at a Priority
of 3 to 5,
you will have the flexibility of adding special events at a higher priority.
You can schedule a holiday presentation or a presentation with an emergency
message without cancelling the events on the schedule by leaving the default
Priority setting at 1.
The following illustration shows how the higher priority event would fit
in your regular schedule.
7. To access the presentations to play in this particular zone, click the folder navigator icon.
8. Select the arrow next to Root to expand the list of folders.
9. Select Presentation from the drop-down list.
10. Enter keywords or letters in the Search field and click Search. Or, leave the field empty and click Search to bring up entire list of presentations within the folder. The presentations will appear in the left panel.
NOTE: All presentations in the folder will appear in the list whether they are properly sized for this zone or not. Zone-Level Presentations not sized for the zone will Scale To Fit in the zone and any gaps between the presentation and the edge of the zone will display in black on the screens. However, any catalog items in the zone-level presentation will not scale to fit. See Creating Zone-Level Presentations for instructions on creating properly sized presentations.
11. Select the presentation(s) to be displayed in the zone. Use the up and down arrows to reorder if needed
12. If there are more than one items (presentation, images, or videos) in the playlist, set the duration that each one should play before rotating to the next item.

NOTE: If the items added are presentations, the zone schedule duration setting overrides the duration setting on each presentation. The presentation duration is located below the widgets in the presentation builder page and by default is set to 45 seconds.
13. Click Add.
14. Click Save in the presentation to send to the player (if the presentation has not been scheduled, see Creating a New Schedule).
If displaying multiple zone-level presentations in a zone that will have different start and/or end dates and times, recurrences, or priority settings, then add multiple events to the zone.
To add more events to the zone:
1. In the presentation, click the zone containing the existing zone schedule and click Add Event.
2. In the Manage Events window make desired settings as instruction in Adding a Zone Schedule to Presentation Zone.
3. Click Save in the presentation to send updates to the player.
Create presentations with the same pixel dimensions as the zone in which they will be played. The dimensions are set in the template. See Creating a New Template. Normally you would set the resolution of the template to the resolution of the screen but for zone-level presentations, the resolution is set according to the zone dimensions in which it will be displayed.
IMPORTANT: Zone-Level Presentations not created with the exact pixel dimensions of the zone into which they will be added will Scale To Fit to that zone. Any gaps will play black on the screen. However, catalog items including both text and images will not scale at all. If the zone-level presentation is too large and it contains catalog items, only the top left corner will display in the zone.
If the zone-level presentation will contain a custom layout with editable text, then set the parameters of the layout to the same dimensions as the zone in the template. See Creating a New Layout. Catalog Items will be needed for custom layouts. See Create New Catalog Item. Themes (text formatting) will need to be created and applied to the layout. See Create New Theme and Applying Themes to the Layout.
Any images or videos that will be played in the presentation need to be uploaded. See Adding a New Asset.
Create the presentation as normal. See Creating a New Presentation with sections on how to use each widget. See the steps in Adding a Zone Schedule to a Presentation Zone above.
NOTE:
The Duration located below the widgets in the presentation builder page
is set to 45 seconds by default. However, the duration setting in the
zone schedule Manage Event window
next to each presentation overrides
the duration in the presentation builder page.
Zone Schedules that have been set in a zone can be edited at any time.
To edit an existing zone schedule:
1. In the presentation, click the zone containing the existing zone schedule and click Edit.
2. In the Manage Event window, make changes to settings or presentations and click Update.
3. Click Save in the presentation to send updates to the player.
Zone Scheduling does not have a Clear Zone function.
The Zone Schedule can be replaced with other types of content by dragging
and dropping another widget onto that zone. If you need the zone to be
cleared, drag and drop the image widget  , select
any image, and click Save. Click the clear zone link and save the presentation.
, select
any image, and click Save. Click the clear zone link and save the presentation.
After editing a presentation, you can click Preview to see how the presentation will be displayed. In the preview, you may have to scroll down to see a zone at the bottom depending on the orientation and the size of the preview.
■ Videos are played for the specified duration.
■ Playlists are played in sequence, including all images and streamed videos.
■ Menuboard items are fully rendered with any animations.
NOTE: Based on the amount of content needing to download, the preview may take a few moments to fully appear.
IMPORTANT: If an image in a zone is requiring transparency and was placed in the presentation using the Image or Playlist Widget, the transparent areas would display in black on the monitor. This does not show up using the Preview function. See Understanding and Resolving Letterboxing for more information.
Preview:
After editing a presentation, changes will not appear on the monitor (display) until the presentation is saved.
NOTE: If the presentation has already been scheduled and sent to a player, saving automatically pushes the changed presentation to the player.
To save a presentation:
1. Click the Save button at the top of the Presentation editor.
If this presentation has connections with any other board (shared catalog items), schedule or player, a Dependency List will appear listing all of the presentations the update affects. Next to each presentation listed (there may only be one), a Preview button appears enabling you to preview every presentation the update appears in before committing the save.
2. Click Preview to view the presentations, if needed.
3. At the bottom of the Preview are navigation buttons to scroll through all of the presentations affected by the change

4. If you are sure that the presentations look correct, click Yes and the current presentation is saved and if scheduled with an assigned player, will display on your screens. Wait for the green message to appear stating that the presentation has been saved successfully before closing out of the presentation.
Scheduling and Pushing Out a Presentation to a Player
Once you have assembled and saved your presentation, you are ready to schedule it and send it out to the player. See Presentation Schedule Management for more information.
Saving a Presentation as a Different File Name
You have the option to save a copy of your presentation under a different name while preserving every other aspect of the current presentation using the Save As feature.
To save a presentation with a different file name:
1. In the Presentation editor, select Save As to save the presentation under a new file name.
The following dialog box appears:
2. The Save As name defaults to the current name.
3. Enter a new name in the Enter the Presentation Name field.
4. Click Save to save the new presentation.
IMPORTANT: The catalog items in the Saved As presentation are copied but are the same catalog items as in the original presentation -- they come from one source. To have unique catalog items for the Saved As presentation, the catalog items need to be copied in the Catalogs tab, given unique names, and then associated back to the presentation. See Creating Cycle Menus for more information.
If you have already saved your presentation and wish to rename it, you can use the Rename feature.
1. In the Presentation editor, select Rename to rename the current presentation.
The following dialog box appears:
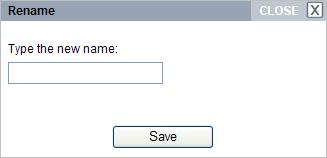
2. Enter a new name for the presentation.
3. Click Save to save the new name.
4. Close the presentation by clicking the Presentations tab without saving the presentation.
Discarding Changes to a Presentation
If you have made changes to a presentation, have not clicked Save, and do not want to save those changes, you can use the Discard Changes feature. Any changes made since the last time Save was clicked will be lost.
1. In the Presentation editor, select Discard Changes to discard changes made to a presentation since the last save.
The following dialog box appears:

2. Click OK to delete the changes. Click Cancel to leave the changes as is.
Editing an Existing Presentation
Once a presentation has been created and saved, it can be edited.
1. In the Presentation Management window, click Edit for the presentation you want to change.
The system processes the access rules and dependencies.
It checks if your access settings include viewing, updating, or deleting the selected presentation. If you are not permitted to open this presentation, a message will appear stating such and the presentation will not open.
It also checks where this presentation is currently being used. If it is being used the following window appears with the Schedules tab:
Each tab will list all of the items that would be affected if the layout was edited in any way.
If you are sure that this layout can be viewed and/or edited, click Yes and the presentation editor appears:
2. Click the zone you want to edit. For a detailed explanation of this window’s functionality, see Creating a New Presentation.
NOTE: The type of content that is contained in the zone you are editing, determines what type of editing window appears, i.e., image or movie content and custom content such as text and images grouped together (catalog items). See Create Catalog Item for more information about Catalog Items.
3. For image or movie content:
a. Click edit image or edit movie in the Zone Details area.
The following window appears:
b. Select a different movie, change the scaling, looping or other settings and click SAVE.
4. For layout zone text (inserted by the Layout Widget):
a. Select the zone containing the content to be changed.
The following window appears below the presentation:
b. Click the plus sign (+) next to the Catalog Item to expand.
The Catalog Item details are now available to edit.
c. Edit the text in the text box.
d. Click the Update button.
The changes appear in the presentation but do not display on the screens until the presentation is saved.
NOTES: For common catalog items, such as the sizes and prices in the above example, changing one $6.00 price to $6.50 will change all of the $6.00 prices. If you want to change only one salad price, you must create a new catalog item. See Create Catalog Items for more information.
e. Save the presentation after all of the changes have been made. Changes will go directly to the display.
5. For layout zone image (inserted by the Layout Widget):
a. Select the zone containing the content to be changed.
The following window appears below the presentation:
b. Click the plus sign (+) next to the Catalog Item to expand.
c. The Icon Image and Change Image button now appear.
d. Click Change Image. The Assign Image window appears.

e. Select new image and click OK. If desired image is not in list, click the Browse button and upload the image.
f. Click Update.
g. Save the presentation. Changes will go directly to the display.
1. Once you have edited the text and/or image, clicked Update, and saved the presentation and you need to switch back to the original settings, click the Discard Changes button in the editor below the presentation. The changes made will revert back in the presentation.
2. Click Save in the Presentation page to send the changes to the player.
NOTE: This Discard Changes function only goes back one level of changes. It is not a multiple undo button.
A zone within the presentation can be completely cleared of its contents including all text and images. The zone boundaries are left intact.
To clear the contents of a zone:
1. Click the zone in the presentation once. A red outline appears.
2. Click clear zone located below the presentation. The zone becomes empty.
NOTE: The assets and catalog items are not deleted from the system when you clear a zone.
TIP: To reverse this action, click Discard Changes before clicking Save in the presentation.
To clear the contents of a zone containing catalog items:
1. Drag
the image widget  onto
the zone you wish to clear.
onto
the zone you wish to clear.
2. Select any image from the Assign Image window and click Save.
3. Select the zone and click clear zone. The zone becomes empty.
TIP: To reverse this action, click Discard Changes before clicking Save in the presentation.
If you have created a presentation which contains the same or similar specifications as a new project, you can save time by copying and renaming it rather than creating a new presentation. However, copying a presentation also copies the catalog items within it. These catalog items all come from one source and when a catalog item is edited on one presentation it will also change the catalog item on the copied presentation. To avoid this, the catalog items will also need to be copied, given unique names, and associated with the copied presentation. See Creating Cycle Menus for step-by-step instructions.
To copy a presentation:
1. In the Presentation Management window, select Copy for the presentation you want to copy.
2. The following window appears:
2. Select a folder in which to place the new presentation.
The following dialog appears:
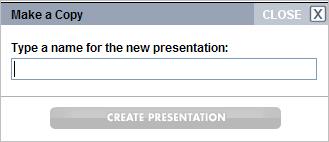
3. Enter a name for the copy.
4. Click Create Presentation to create the copy.
IMPORTANT: If the presentation copy contains catalog items, even though they are copies, they still come from one source. If these catalog items are edited, the catalog items on the original presentation will change as well. To separate them, see the instructions in Creating Cycle Menus.
In the Presentation Management window, click Delete for the presentation you want to permanently delete. A confirmation message appears to verify that you want to delete it. You can delete a presentation from either of the following:
IMPORTANT: The Delete action is permanent and there is no undo function available for deleted objects.
If the presentation is in a schedule you may see the following message:
If this message appears, you will not be able to delete the presentation until it is removed from the schedule. To locate which schedules the presentation is in, click Edit next to the presentation name. When the Dependency List opens, click the Schedules tab. It will list the schedules in which this presentation is located. Click the link of the schedule to open.


