

The ticker is a new widget that allows you to specify an RSS feed or ticker-specific catalog items (custom editable text) that will scroll across a zone in a presentation.
A background can be selected, will scroll left or right and a theme (text formatting) can be selected for displaying the text. The background can be any color or an image that has been properly formatted for the zone.
Ticker Strategies and Guidelines
Three Main Steps for Adding a Ticker to a Presentation
Creating Catalog Items for Tickers
Using Special Characters in between Catalog Items
Table of Special ALT Characters
Preparing a Background Image for a Ticker
Adding a Ticker to Presentation
Always seek permission to use a site's RSS feed and follow their rules and guidelines.
Do not use just any picture as a background for a ticker. Be sure to crop it and give it the right dimensions for the zone in which the ticker will be displayed. See Preparing a Background Image for a Ticker.
The catalog item ticker and the RSS feed ticker may scroll at different speeds so adjust accordingly.
The scrolling ticker cannot be previewed prior to sending to the screen. However, the ticker will scroll in the presentation editor using Google Chrome.
The catalog item ticker must use the Item Types of TickerItemTitle and TickerItemDescription. Any other Item Type will not display the text in the ticker.
Images cannot be scrolled in a ticker.
If you adjust the ticker zone in the template, the ticker needs to be reset in the presentation to display properly.
Step 1: If the ticker will include custom text, create a ticker catalog item in the Catalogs tab. If the ticker will contain an RSS feed, skip to Step 2.
Step 2: Create the ticker in the Tickers tab with either the custom text created in the Catalogs tab or with an RSS feed via a URL.
Step 3: Add the ticker to the presentation using the Ticker widget.
Tickers can display either RSS feeds or text that you create. The text that you create are entered in Catalog Items on the Content/Catalogs tab. This text can be edited at any time from the Catalogs tab.
To create a ticker catalog item:
1. Click the Content/Catalogs tab and then click Create New Ticker.

2. In the Create New Catalog Item form, enter the Item Name (always use good naming conventions including the name of your site at the beginning) and any Description (optional).
NOTE: The Description field is informational only, optional, and does not appear on the ticker.
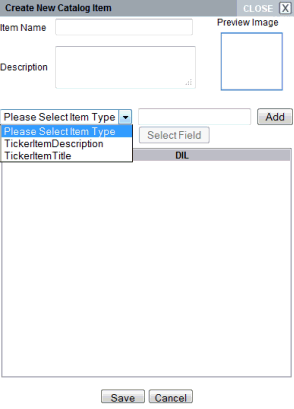
3. In the Please Select Item Type drop-down list, select TickerItemTitle, then enter the text you want to appear on the ticker.
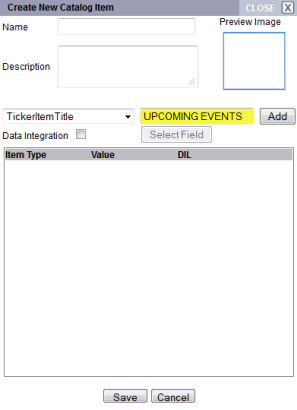
IMPORTANT: The ticker requires both a Title and a Description. If you do not want both, put a space in the field to the right after selecting the Item Type and click Add.
4. Click Add.
5. In the Please Select Item Type drop-down list, select TickerItemDescription.
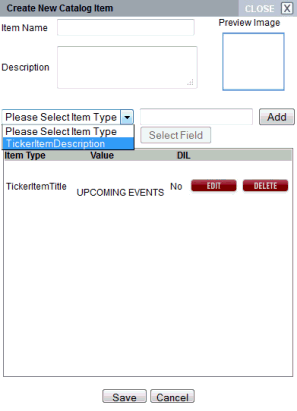
6. Enter the text that you want to appear after the Title on the ticker in the empty field to the right of the drop-down list. Click Add.
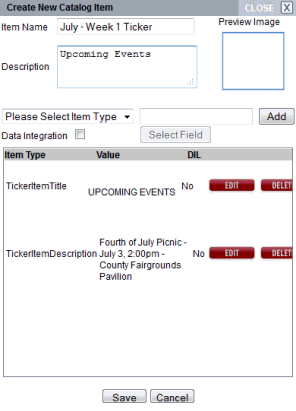
7. Click Save.

Once the ticker is created (instructions in next section), the text in the above screenshots would display like this:

NOTE: The font, font color, and background color were selected for this example. You can select any color or font.
Using most fonts, special characters can be inserted in between the Title and the Description to create more of a distinction between the two using the ALT key and the numeric key section of your keyboard.
To insert special characters in ticker catalog items:
1. If the ticker catalog item has already been created, click the Content/Catalogs tab and locate the catalog item.
2. Click Edit to open. Click Yes if the Dependency List appears.
3. Next to the TickerItemTitle item click Edit.
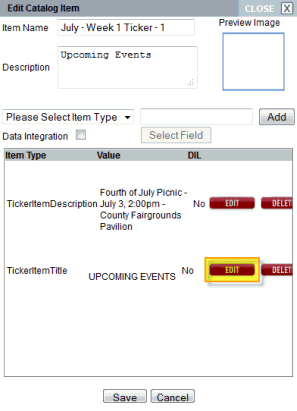
4. In the Edit Catalog Item Detail window, enter a few spaces after the title, in this case "UPCOMING EVENTS." Then press ALT 7 (which adds a bullet) and add a space.
IMPORTANT: You must use the Numeric Keypad on your keyboard for the special characters to appear.
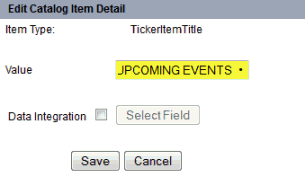
5. Click Save.

6. Click Save to close the Create New Catalog Item window.
The ticker example now looks like this:

Breaking up the text can be done with punctuation or with any number of Special ALT Character options. Experiment with different characters and spacing. Without special characters there is one space in between the Title and the Description when it displays on the screen. See the Table of Special ALT Characters at the end of this section. You will need to create the ticker which is outlined in the next section before you can see the results.
NOTE: Special Characters have to have the same theme as the text, meaning it has to be the same font and same font color. Some fonts may not support these special characters.
To obtain an ALT Character:
1. Make certain the Num Lock key has been pressed to activate the numeric key section of the keyboard.
2. Depress the Alt key.
3. While the Alt key is depressed, type the proper sequence of numbers on the numeric keypad from the table below.
4. Release the Alt key and the character will appear.
NOTE: On laptop computers, there is usually not a numeric keypad. Instead, press the Fn (function) key, then Alt, and then the numerical code sequence.
IMPORTANT: Special Characters are not necessarily a supported function by Wireless Ronin. There is no guarantee that this will work with every font or internet browser. Some characters may not appear in some internet browsers.
Character |
ALT Code |
|
Character |
ALT Code |
|
Character |
ALT Code |
|
Character |
ALT Code |
☺ |
Alt 1 |
|
☻ |
Alt 2 |
|
♥ |
Alt 3 |
|
♦ |
Alt 4 |
♣ |
Alt 5 |
|
♠ |
Alt 6 |
|
• |
Alt 7 |
|
◘ |
Alt 8 |
○ |
Alt 9 |
|
◙ |
Alt 10 |
|
♂ |
Alt 11 |
|
♀ |
Alt 12 |
♪ |
Alt 13 |
|
♫ |
Alt 14 |
|
☼ |
Alt 15 |
|
► |
Alt 16 |
◄ |
Alt 17 |
|
↕ |
Alt 18 |
|
‼ |
Alt 19 |
|
¶ |
Alt 20 |
§ |
Alt 21 |
|
▬ |
Alt 22 |
|
↨ |
Alt 23 |
|
↑ |
Alt 24 |
↓ |
Alt 25 |
|
→ |
Alt 26 |
|
← |
Alt 27 |
|
∟ |
Alt 28 |
↔ |
Alt 29 |
|
▲ |
Alt 30 |
|
▼ |
Alt 31 |
|
ü |
Alt 129 |
é |
Alt 130 |
|
â |
Alt 131 |
|
ä |
Alt 132 |
|
à |
Alt 133 |
å |
Alt 134 |
|
ç |
Alt 135 |
|
ê |
Alt 136 |
|
ë |
Alt 137 |
è |
Alt 138 |
|
ï |
Alt 139 |
|
î |
Alt 140 |
|
ì |
Alt 141 |
æ |
Alt 145 |
|
Æ |
Alt 146 |
|
ô |
Alt 147 |
|
ö |
Alt 148 |
ò |
Alt 149 |
|
û |
Alt 150 |
|
ù |
Alt 151 |
|
¢ |
Alt 155 |
£ |
Alt 156 |
|
¥ |
Alt 157 |
|
₧ |
Alt 158 |
|
ƒ |
Alt 159 |
á |
Alt 160 |
|
í |
Alt 161 |
|
ó |
Alt 162 |
|
ú |
Alt 163 |
ñ |
Alt 164 |
|
Ñ |
Alt 165 |
|
ª |
Alt 166 |
|
º |
Alt 167 |
¿ |
Alt 168 |
|
½ |
Alt 171 |
|
¼ |
Alt 172 |
|
« |
Alt 174 |
» |
Alt 175 |
|
░ |
Alt 176 |
|
▒ |
Alt 177 |
|
▓ |
Alt 178 |
│ |
Alt 179 |
|
║ |
Alt 186 |
|
─ |
Alt 196 |
|
∞ |
Alt 236 |
≥ |
Alt 242 |
|
≤ |
Alt 243 |
|
≈ |
Alt 247 |
|
° |
Alt 248 |
■ |
Alt 254 |
|
† |
Alt 0134 |
|
‘ |
Alt 0145 |
|
’ |
Alt 0146 |
“ |
Alt 0147 |
|
” |
Alt 0148 |
|
— |
Alt 0151 |
|
™ |
Alt 0153 |
© |
Alt 0169 |
|
® |
Alt 0174 |
|
¾ |
Alt 0190 |
|
|
|
See Create New Theme for instructions on creating a theme.
Once you created the ticker catalog items or have secured an RSS feed, the ticker itself is then created. This is where the data source is selected, the theme set, the background chosen, either a color or an image, the scroll speed and the scroll direction set, and the distance (padding) between each ticker item set.
To create a ticker:
1. Click the Content/Tickers tab and Create New Ticker.

2. Select a folder in the Choose Folder for New Object window.
3. Enter the name of the ticker using a naming convention that identifies your site and what kind of ticker it is. For example, if you will have both a catalog item ticker and an RSS feed ticker, identify them as such in the name, i.e., "CSU-July Events-1" and "CSU-Campus Sports RSS."
4. To add catalog items to the ticker:
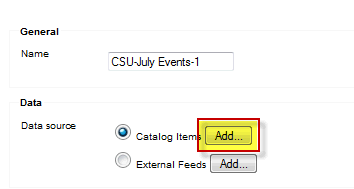
a) Click Add next to Catalog Items.
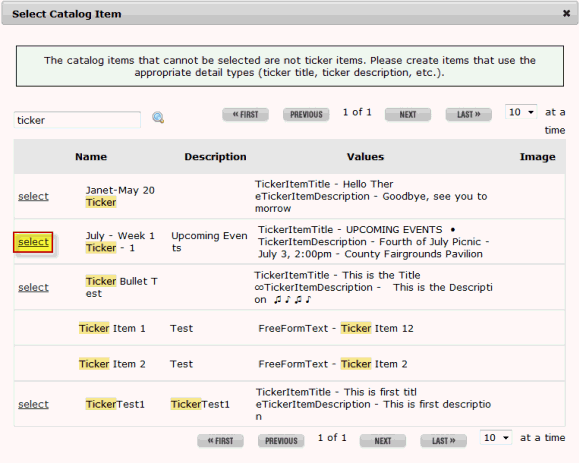
b) Search for and select the ticker catalog item previously created.
NOTE: Only catalog items with the TickerItemTitle and TickerItemDescription Item Types can be selected.
c) To add more than one catalog item in this ticker, click Add again next to Catalog Items.
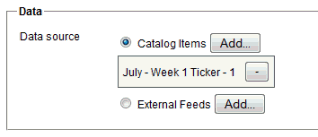
d) Once all of the catalog items have been added, move on to Step 6.
e) To
remove a catalog item, click  .
.
5. To add an RSS feed to the ticker:
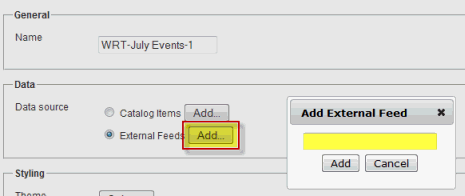
a) Select External Feeds and click Add.
b) In the Add External Feed window, enter the URL of the feed in the field and click Add.
IMPORTANT: You are responsible for obtaining any permissions required for using an organization's RSS feeds and adhering to their policies surrounding the use of that RSS feed. Wireless Ronin Technologies is not responsible for anyone using RoninCast's ticker feature displaying unauthorized RSS feeds or displaying them improperly.
c) To add more than one RSS feed, click Add again next to External Feeds.

6. To apply a theme (text formatting) to the ticker, click Select in the Styling section next to Theme.

7. If a theme has not yet been created, go to Creating a Theme for a Ticker for instructions.
8. In the Select Theme window, search for and select the theme for the ticker. If no theme is selected, the default theme will be used.
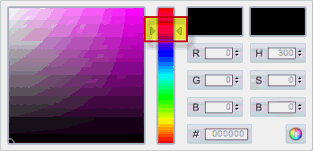
9. If a background color is desired (default is white), click in the empty field next to Color. The color picker appears.
a) Use the slider arrows to select a range of color.
b) Then select the circle in the bottom left corner of the color window and move to the desired shade.
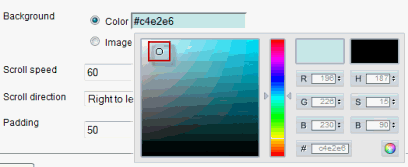
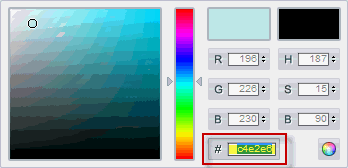
c) If you know the hexadecimal number for a certain color, enter it in the # field.
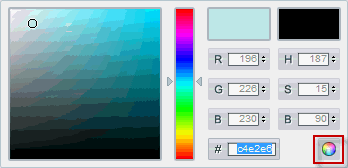
d) Click the multi-colored orb to close the color picker.
10. To select an image for the background:
a) Click Image and then Select in the Styling/Background section.
IMPORTANT: To achieve a quality ticker using an image as a background, the image must be properly formatted for the zone in which the ticker will be displayed. See Preparing a Background Image for a Ticker.
b) In the Select Background Image window, search for and select the desired image.
NOTE: If the image has not yet been uploaded into RoninCast, click Upload and use the same steps outlined in Adding a New Asset.
c) Click Save.
d) To
remove the image, click  .
.
NOTE: If no image is selected or the image is removed, the ticker will play a white background.
11. Set the Scroll speed. The default is 60 seconds to scroll across the screen.
TIP: Experiment with different speeds. Start on the lower end for tickers containing catalog items, such as "5" or "10." External Feed tickers scroll much faster so start with "1000."
12. Set the Scroll direction either Right to left or Left to right. Tickers normally run right to left.
13. Set the Padding which determines the amount of space in between feeds.
14. Click Save. The ticker will preview at the top.
NOTE: Internet Explorer does not preview the ticker on this page but will display on the monitors. Firefox and Chrome are recommended if you wish to preview the ticker.
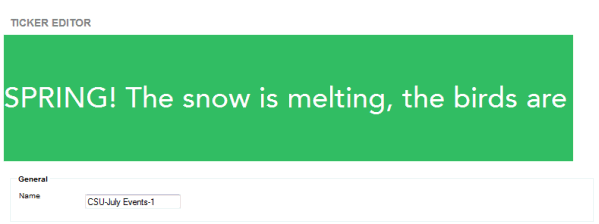
Any images selected as a background for the ticker cannot be Stretch To Fit so the image needs to have the right dimensions to display properly. The image needs to have the same Aspect Ratio or Pixels as the zone in which the ticker will display.
To prepare an image for a ticker background:
1. Open the presentation in which the ticker will be displayed.
2. Click the zone in which the ticker will be displayed. If the zone is empty, the dimensions will be displayed within the zone.

3. If the zone already has content, when selected the dimensions are displayed below the presentation.

4. Format the background image to the same pixels as the ticker zone. If you don't have an image converter, download this free software: http://www.dvdvideosoft.com/free-dvd-video-software.htm
5. Upload the image in the Asset tab. See Adding a New Asset for instructions.
6. See Creating a Ticker, Step 9 for adding the background image to the ticker.
Once the tickers have been created, they are ready to add to the presentation using the Ticker Widget.
To add a ticker to the presentation:
1. Click the Content/Presentations tab.
2. Open the presentation by clicking Edit.
3. Drag and
drop the ticker widget  onto
the zone.
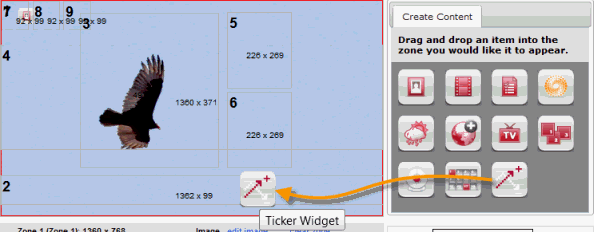
4. Select the ticker from the Select Ticker window.
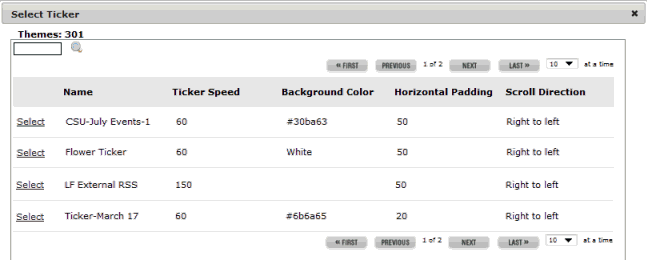
5. Click Save in the presentation.

Tickers can be edited by swapping the current ticker for a different one within the presentation by clicking the ticker zone, then clicking Change Ticker Widget below the presentation. Or, clear zone can be clicked to delete the ticker from the presentation.
To edit the ticker settings such as the data source, theme, background, scroll speed or direction, or padding, click on the ticker in the Content/Tickers tab.
To edit the text in the ticker catalog items, click the Content/Catalogs tab and search for the name of the catalog item. The editing of the text is done the same way regular catalog items are edited. See Editing a Catalog Item.
If the zone containing the ticker needs to be adjusted, that is done in the Content/Templates tab. See Editing an Existing Template.
IMPORTANT: After adjusting a zone in the template, you must open the presentation and reset the ticker for it to display properly. Select the zone in the presentation, click Change Ticker Widget and then select the ticker again in the Select Ticker window. Save the presentation.
_________________________________________________